

 Ask AI


Editing employee
Choose an assistant. It opens with a ready-made question, reads this article and answers your questions.
Open in ChatGPT (opens in a new tab) Open in Claude (opens in a new tab) Open in Perplexity (opens in a new tab) Open in Gemini (opens in a new tab) Open in Grok (opens in a new tab) View as MarkdownChoose an assistant. It opens with a ready-made question, reads this article and answers your questions.
Open in ChatGPT (opens in a new tab) Open in Claude (opens in a new tab) Open in Perplexity (opens in a new tab) Open in Gemini (opens in a new tab) Open in Grok (opens in a new tab) View as MarkdownOn this page
On this page
Web Application
Introduction
Editing an employee allows you to manage the data and permissions assigned to employees.
From this level, you can update basic information such as first name, last name, phone number, job title, and preferred language. Additionally, it is possible to modify the employee's permissions, including access to rooms and specific modules of the system.
The tab also allows changing login details such as password and email address, and if necessary, deleting the employee's account. This is a crucial tool for ongoing team management and adapting permissions to their role in the company.
Instructions
Go to the Management -> Employees tab.
Click on the employee whose data you want to edit.
The employee edit form will appear on the screen, consisting of 6 tabs: Data, Permissions, Settings, Security, Devices, and Activity.
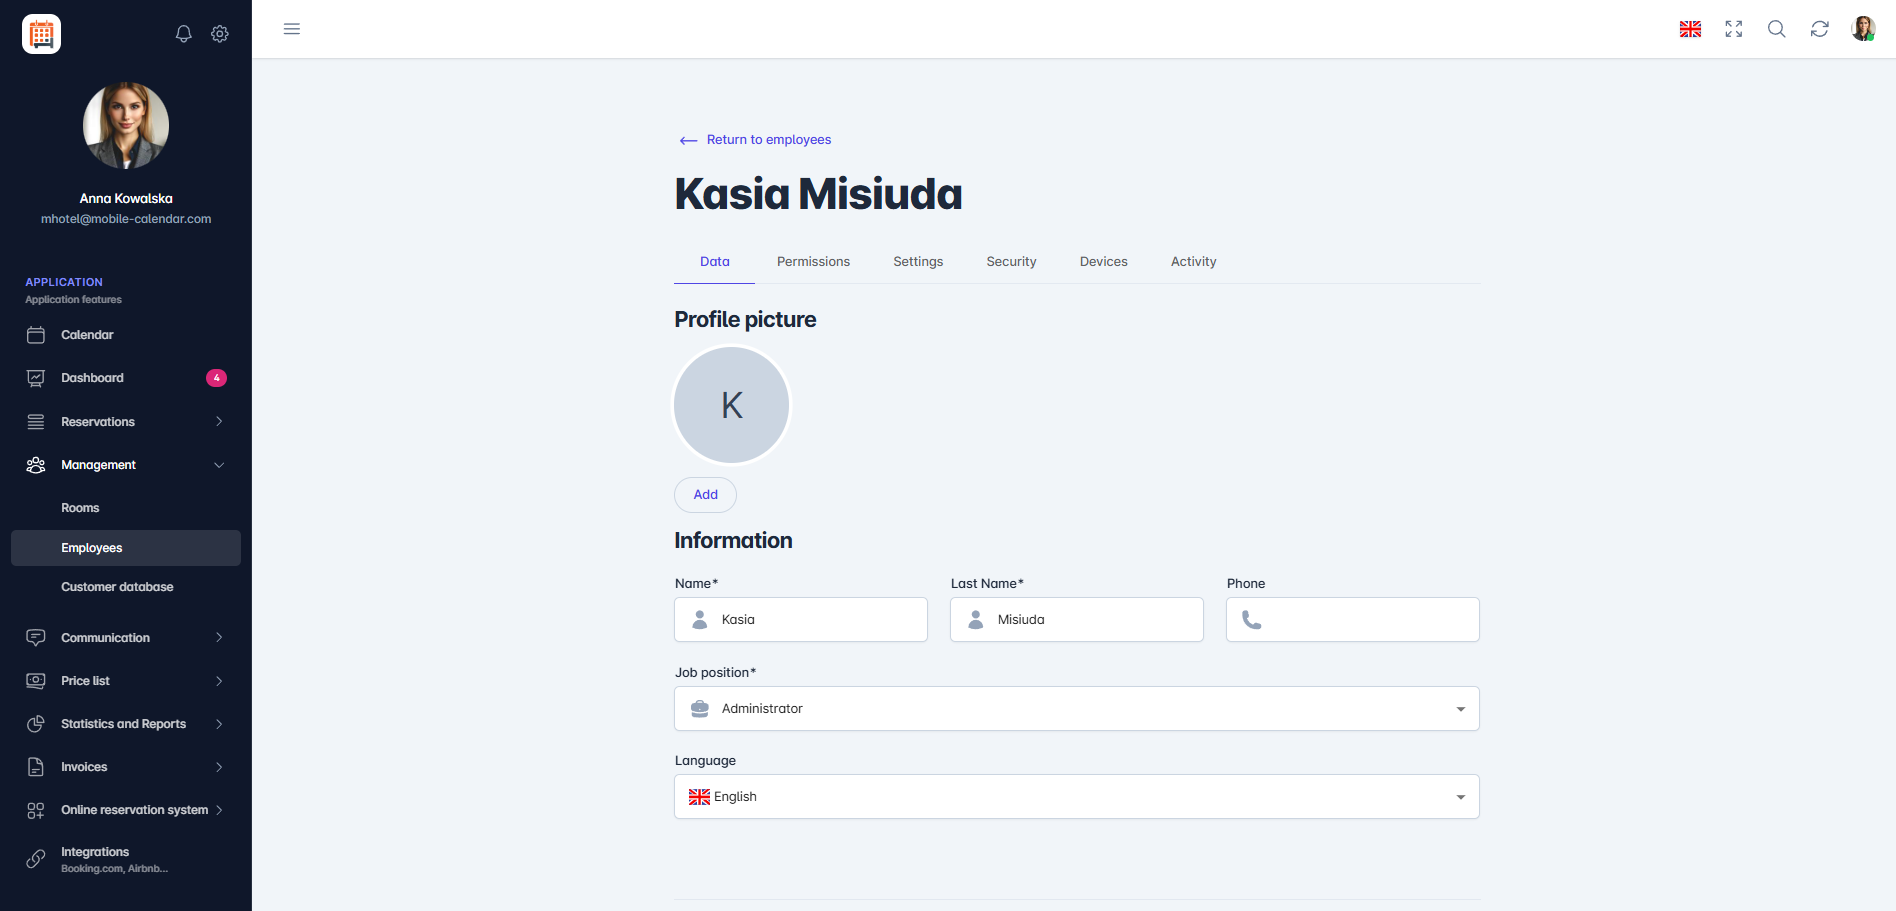
Editing Employee Data
- The Data tab allows you to update basic information about the employee. Editable fields include: First Name, Last Name, Phone, Job Title, and Language.
Permissions
The Permissions tab allows you to update the assigned permissions of the employee. You can specify whether the employee should have access to All rooms or only to Selected rooms. If the second option is chosen, an additional field will be available where specific rooms can be selected.
Below the Room Access field, there are 15 modules where permissions can be assigned. These include Calendar, Dashboard, Reservations, and Invoices, with unique features tailored to the needs of the employee.
After clicking on the selected Module, a list with selectable options will be expanded. You can choose the Select all option to grant all available permissions, or select specific functionalities that should be assigned to the employee.
Settings
The Settings tab allows you to manage the general application options and adapt its features to the individual needs of the user.
In the General section, you can configure the application's general settings, such as theme color and default start panel. Further options related to date and time formats are available to be customized according to personal preferences.
The Calendar section allows you to manage settings for displaying reservations, including choosing a rounded shape and options for dragging reservations. The user can also decide what information should be displayed on reservation labels and in the reservation form, facilitating the customization of the interface to specific needs.
Additionally, this tab allows the configuration of detailed reservation settings, such as how blockages are displayed, changing the room status after the guest checks out, and customizing the content of the reservation confirmation. Preferences for pricing and booking restrictions can also be set.
Security
The Security tab allows you to manage important aspects related to user account protection. In this section, you can change the password, email, and delete the employee.
Change Password: In the Password field, enter a new password and click the Change Password button.
Change Email: In the Enter new email address field, enter the new email Change Email.
Deleting the Employee: In the lower left corner, click the Delete button.
- An additional confirmation message will appear in the center of the screen regarding the deletion of the employee.
- Click the Delete button.

Devices
- The Devices tab allows you to manage the devices on which the user is logged into their account. This functionality enhances security, especially in situations where unauthorized access is suspected.
- From this level, you can monitor all active logins.
- If necessary, there is an option to log out the user from a selected device or from all devices simultaneously by clicking the Log out from all devices button.

Activity
- The Activity tab allows you to track actions performed by the employee within the system.
- From this level, you can review the history of actions, such as data edits or other operations related to application use.
- This is a useful tool for monitoring employee activity and ensuring transparency and security of work within the system.

- To save the changes made, click the Save Changes button.
Mobile Application
Introduction
On an employee's profile, you can change their details, permissions and settings, as well as their password or login email address.
Instructions
In the bottom menu, go to the More tab.
Go to Management -> Employees.
Tap an employee in the list.
A form with the Data, Permissions, Settings, Security, Devices and Activity tabs will appear. To see the remaining tabs, swipe the tab bar to the left.
In the Data tab, change the fields you want, such as Phone or Job position. Changing the job position does not change the employee's permissions.
Tap Save changes.

- Your changes will be saved, and the employee list will appear on the screen.
Employee photo
In the Data tab, tap the Camera icon next to the employee's initials.
In the "Photo" window, tap Add avatar and select a photo.
Employee settings
Tap the Settings tab.
The employee's application settings will appear on the screen, including Theme, Home Page and Date format. Each change applies only to their account.

Was this article helpful?
Ask AI about this article
Choose an assistant. It opens with a ready-made question, reads this article and answers your questions.
Ask AI about this article
Choose an assistant. It opens with a ready-made question, reads this article and answers your questions.