

 Ask AI


Adding an Employee
Choose an assistant. It opens with a ready-made question, reads this article and answers your questions.
Open in ChatGPT (opens in a new tab) Open in Claude (opens in a new tab) Open in Perplexity (opens in a new tab) Open in Gemini (opens in a new tab) Open in Grok (opens in a new tab) View as MarkdownChoose an assistant. It opens with a ready-made question, reads this article and answers your questions.
Open in ChatGPT (opens in a new tab) Open in Claude (opens in a new tab) Open in Perplexity (opens in a new tab) Open in Gemini (opens in a new tab) Open in Grok (opens in a new tab) View as MarkdownOn this page
On this page
Web Application
Introduction
This feature is available on the Professional plan. You can compare plans in the article What features differ between subscriptions?. Employees cannot log in to the account on the Standard plan.
Mobile-calendar lets you create new user accounts that have access to the system. When you add an employee, you assign login credentials (an email address and password) that let them log in to the application themselves.
You can also specify the permissions an employee will have in the system, allowing you to tailor their access to features based on their role in the company. This makes it easy to manage your staff and their permissions.
Instructions
Go to the Management -> Employees tab.
Click the Add button in the top-right corner.
The employee form will appear on the screen. It consists of 2 tabs: Data and Permissions.
In the Data tab, fill in the required fields: First name, Last name, Job position, Email, and Password.
Click the Next button in the bottom-right corner to go to the Permissions tab.
In the Permissions tab:
- Click the Access to rooms field and select one of the options from the drop-down list: All rooms or Selected rooms.
- If you select the second option, an additional Selected rooms field will appear. Click this field and Select the rooms the employee should have access to from the drop-down list.
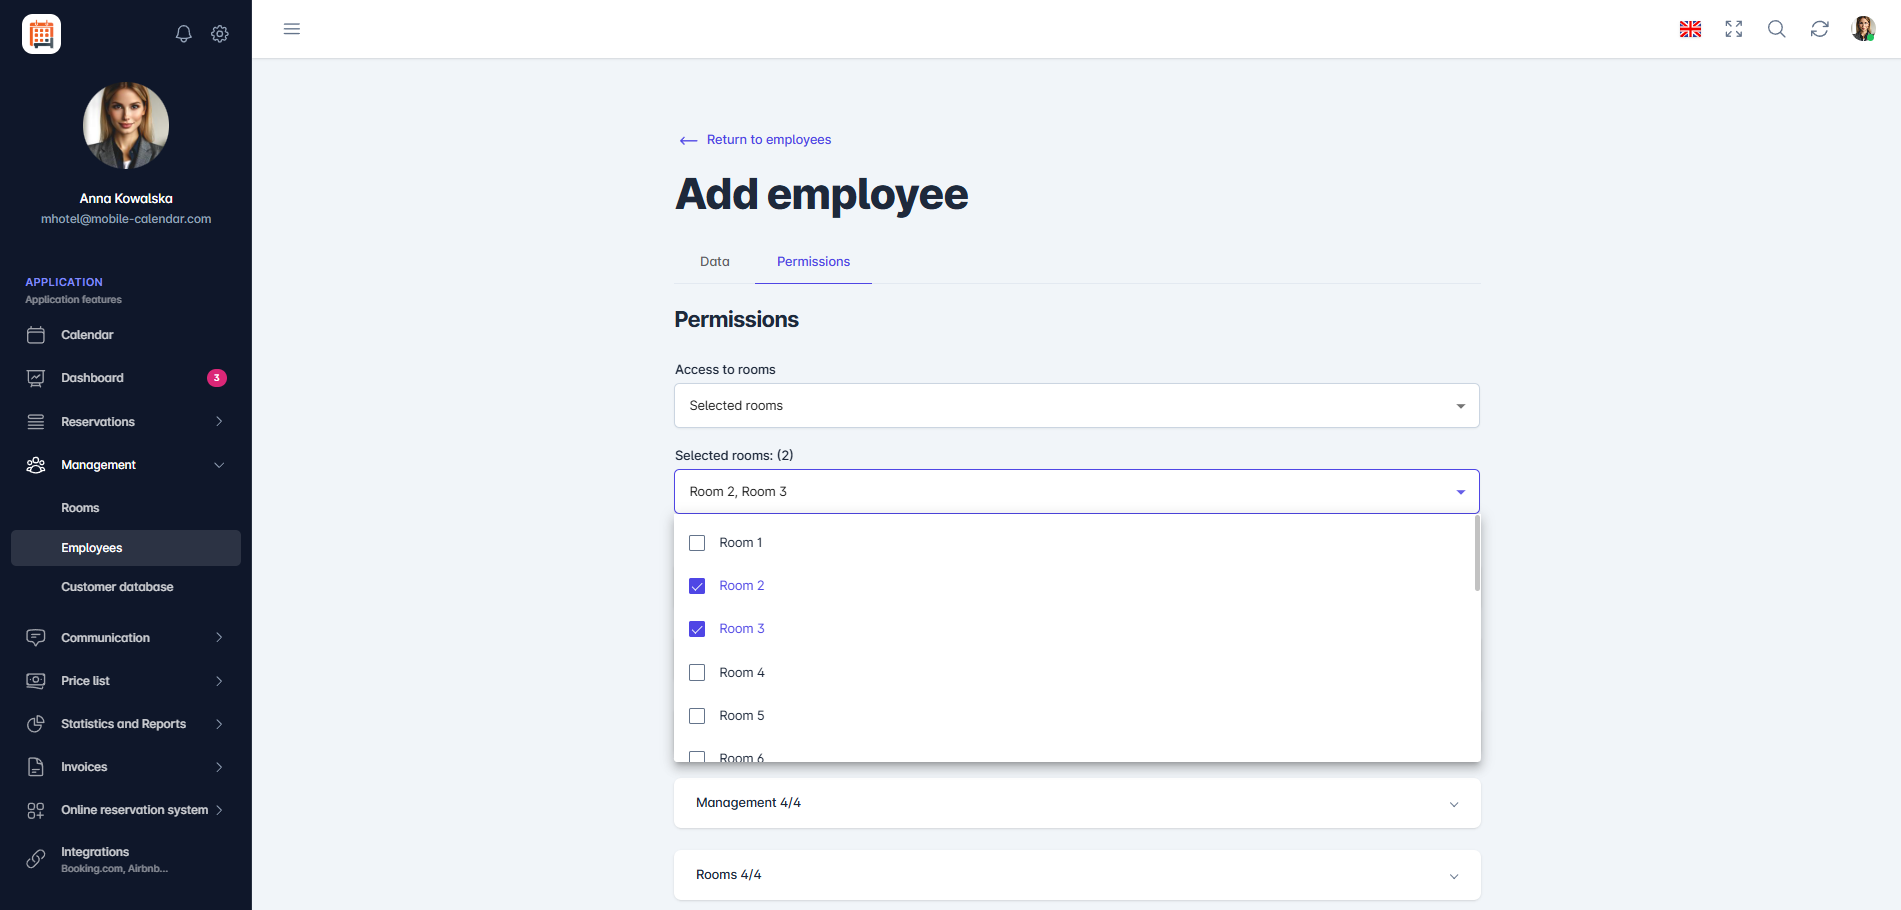
Adding permissions: selected rooms

Below the Access to rooms field, you’ll find 15 modules where you can assign permissions. These include Calendar, Dashboard, Reservations, and Invoices. Each module offers unique features that you can tailor to the employee’s needs.
Click the Module for which you want to assign employee permissions.
When you click a specific Module, a list of detailed options will expand.
- Select Select All to grant all available permissions for that module, or click the checkbox next to each feature you want to grant the employee.
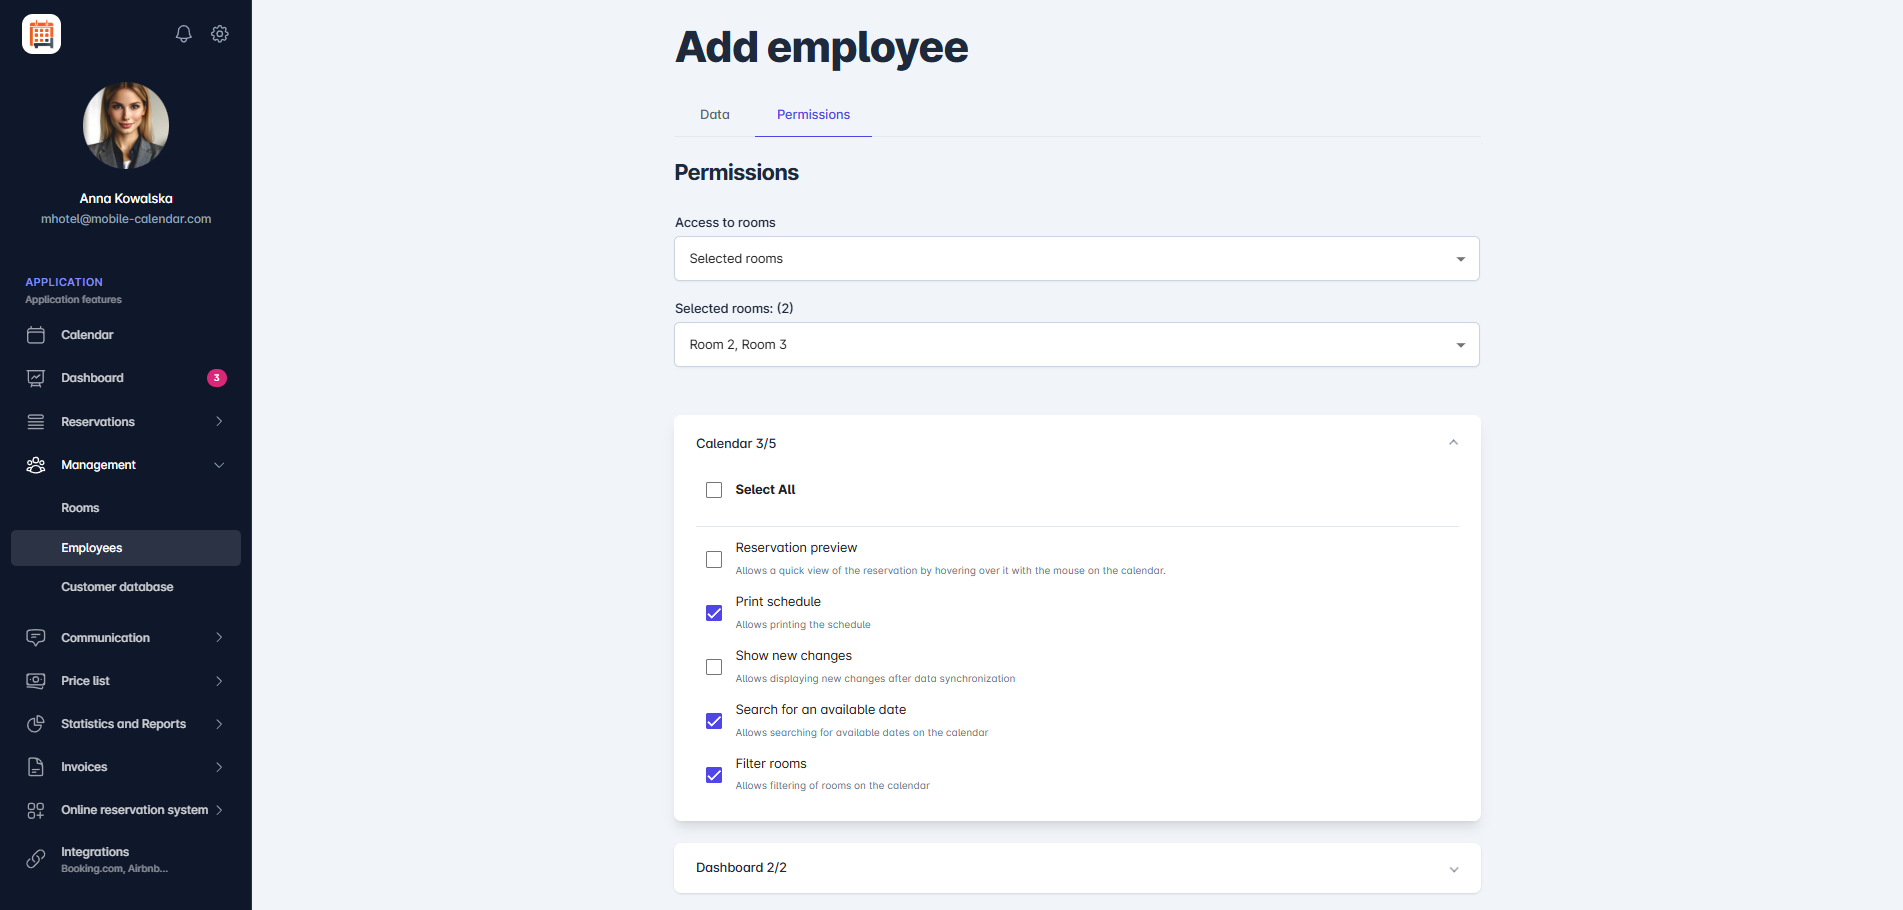
Adding permissions: selected rooms Click the Add employee button in the bottom-right corner.
The employee has been added to the database.

Mobile Application
Introduction
Every employee has their own account in mobile-calendar. They log in with their email address and password, and you decide what they can access.
Instructions
In the bottom menu, go to the More tab.
Go to Management -> Employees.
Tap the + button in the bottom-right corner.

The "Add employee" form will appear on the screen, with the Data card.
Enter the employee’s details in the First name and Last name fields.
You can enter a number in the Phone field. To change the country code, tap it and select a country from the list.
Select a job position in the Job position field. The app will set the default permissions for that position.
Select the employee’s language in the Language field.
Enter the login details the employee will use in the Email and Password fields. The password must contain at least 12 characters, uppercase and lowercase letters, a number, and a special character.

Tap the Permissions card. Select rooms in the Access field, then check the employee’s permissions in the groups below.
Tap the Add button.

- The employee will appear in the list and will be able to log in to their account.
Was this article helpful?
Ask AI about this article
Choose an assistant. It opens with a ready-made question, reads this article and answers your questions.
Ask AI about this article
Choose an assistant. It opens with a ready-made question, reads this article and answers your questions.