

 Ask AI


Invoice Settings
Choose an assistant. It opens with a ready-made question, reads this article and answers your questions.
Open in ChatGPT (opens in a new tab) Open in Claude (opens in a new tab) Open in Perplexity (opens in a new tab) Open in Gemini (opens in a new tab) Open in Grok (opens in a new tab) View as MarkdownOn this page
Introduction
In this section, you will find information on configuring invoice settings in our system. With the appropriate options, you can customize the appearance and content of invoices to meet your business needs, which will enhance the efficiency of your business processes.
Instructions
Invoice settings can be changed from two levels:
In the left menu bar, click the Settings icon at the top.
From the settings list, select Invoicing.
or
- In the left menu bar, click Invoices -> Settings.

Invoice Settings:
Default VAT Rate
By setting a default VAT rate, each new invoice will automatically apply this rate, significantly speeding up the document issuance process and reducing the risk of errors.
Enter the default VAT rate in the "Default VAT Rate" field.
The default VAT rate will be automatically saved.
Automatic Document Filling
- Automatic document filling allows for easy and quick data entry into invoices.
- Choose the appropriate option from the drop-down list: Pull from account data or Custom values.
Pull from account data: When you select this option, the invoice will automatically display the data saved in your account.
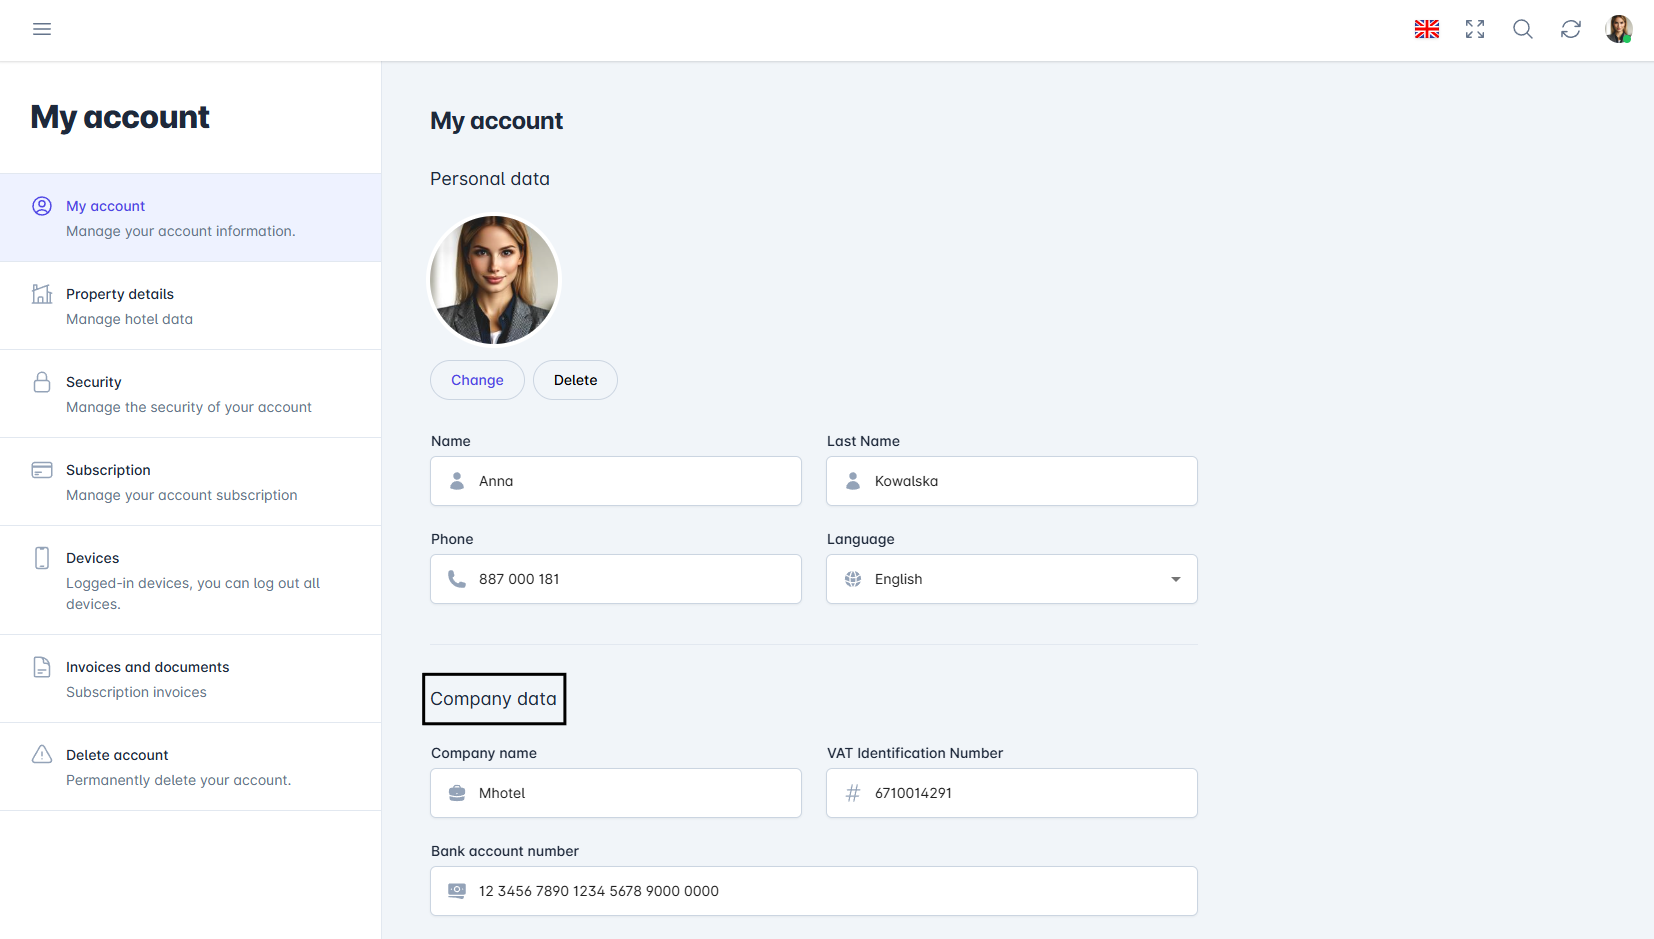
Invoice settings Enter custom values: If you choose this option, a list will be displayed where you can fill in your own values such as Company Name, Tax Identification Number, Address, Bank Account Number, Place of Issue, or Additional Information.
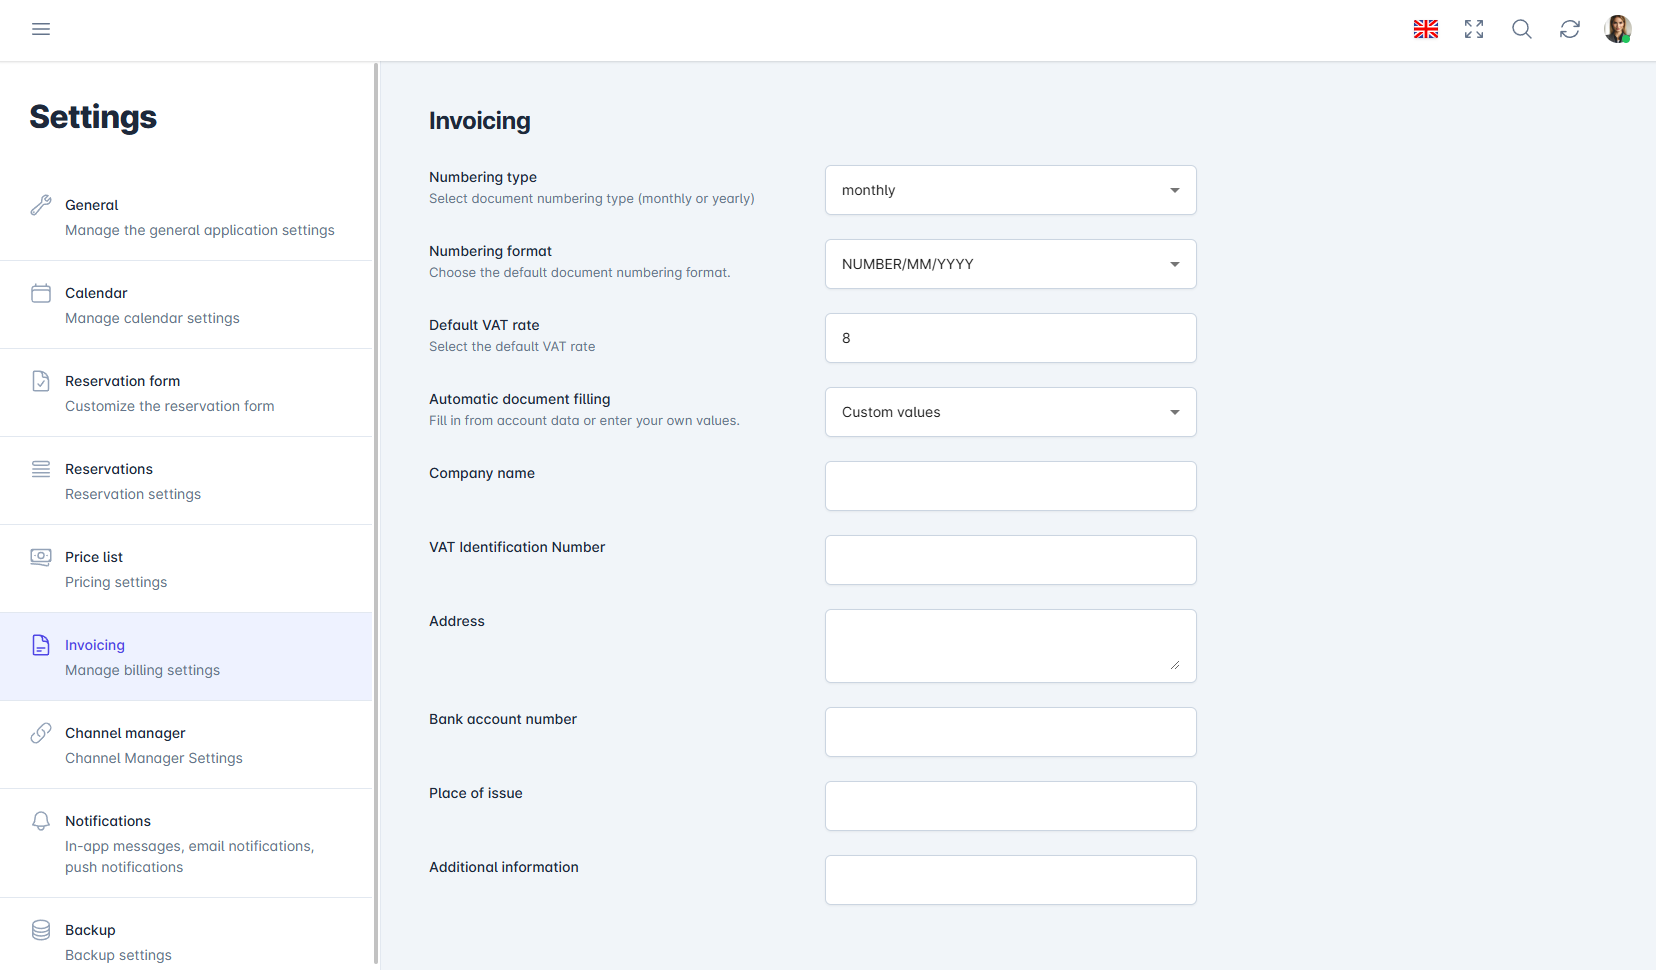
Invoice settings


Custom Logo
Display your company's logo on invoices to strengthen your brand and provide a professional appearance to documents. Adding a logo to invoices not only makes them more visually appealing but also increases your brand recognition among clients.
- In the top right corner, click the Account icon, and select My Account from the drop-down list.
- Go to Property Data.
- In the "Custom Logo" section, click the Change button to open the file browser. Then Select the appropriate image.
- The logo will be automatically saved.
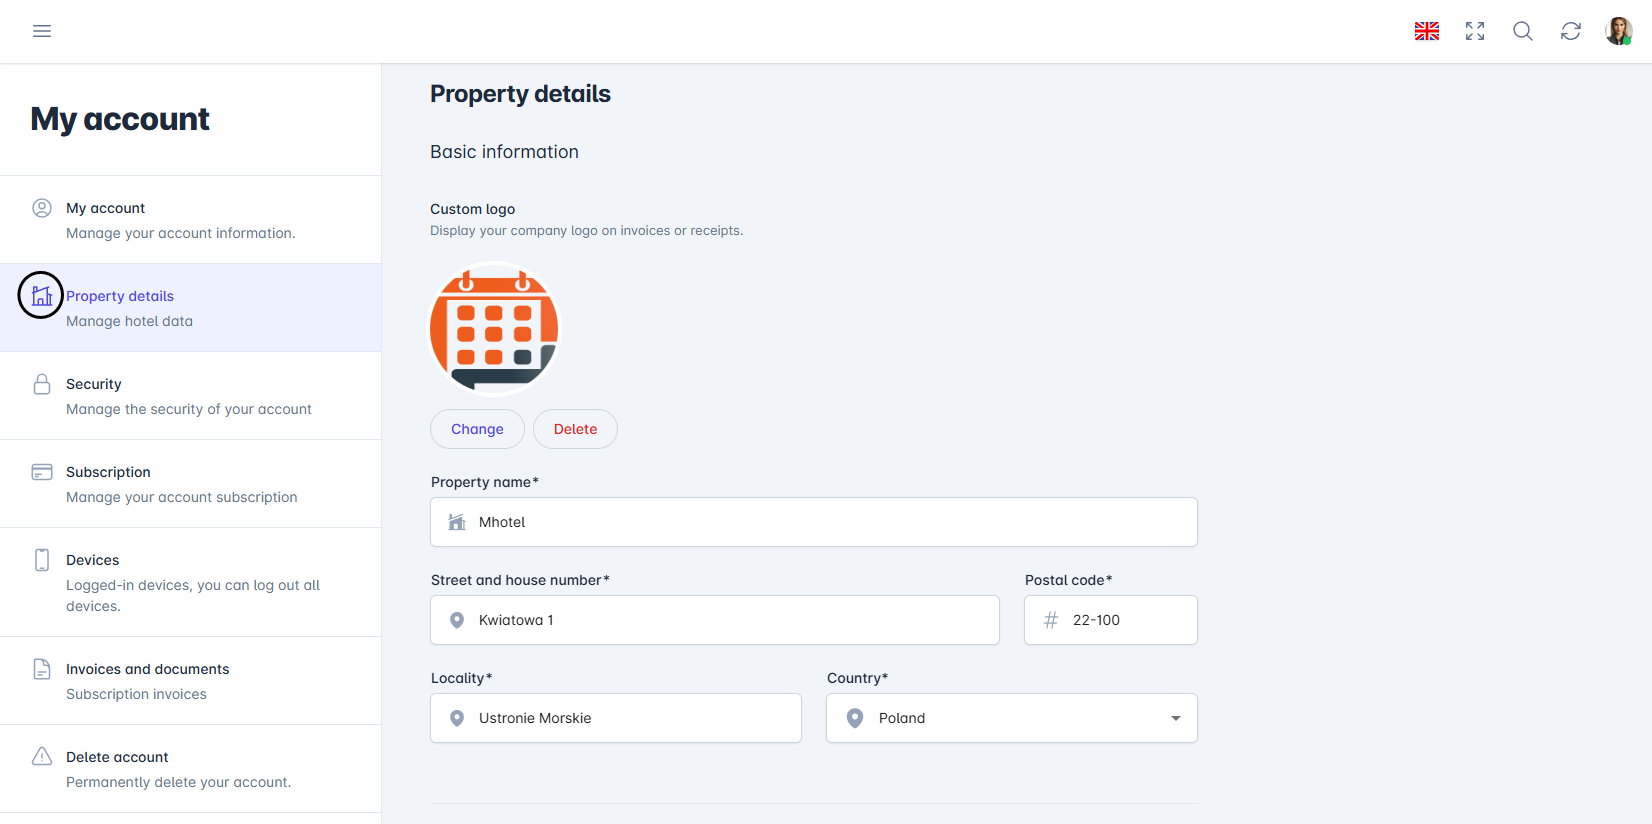
Invoice settings - logo

Was this article helpful?
Ask AI about this article
Choose an assistant. It opens with a ready-made question, reads this article and answers your questions.